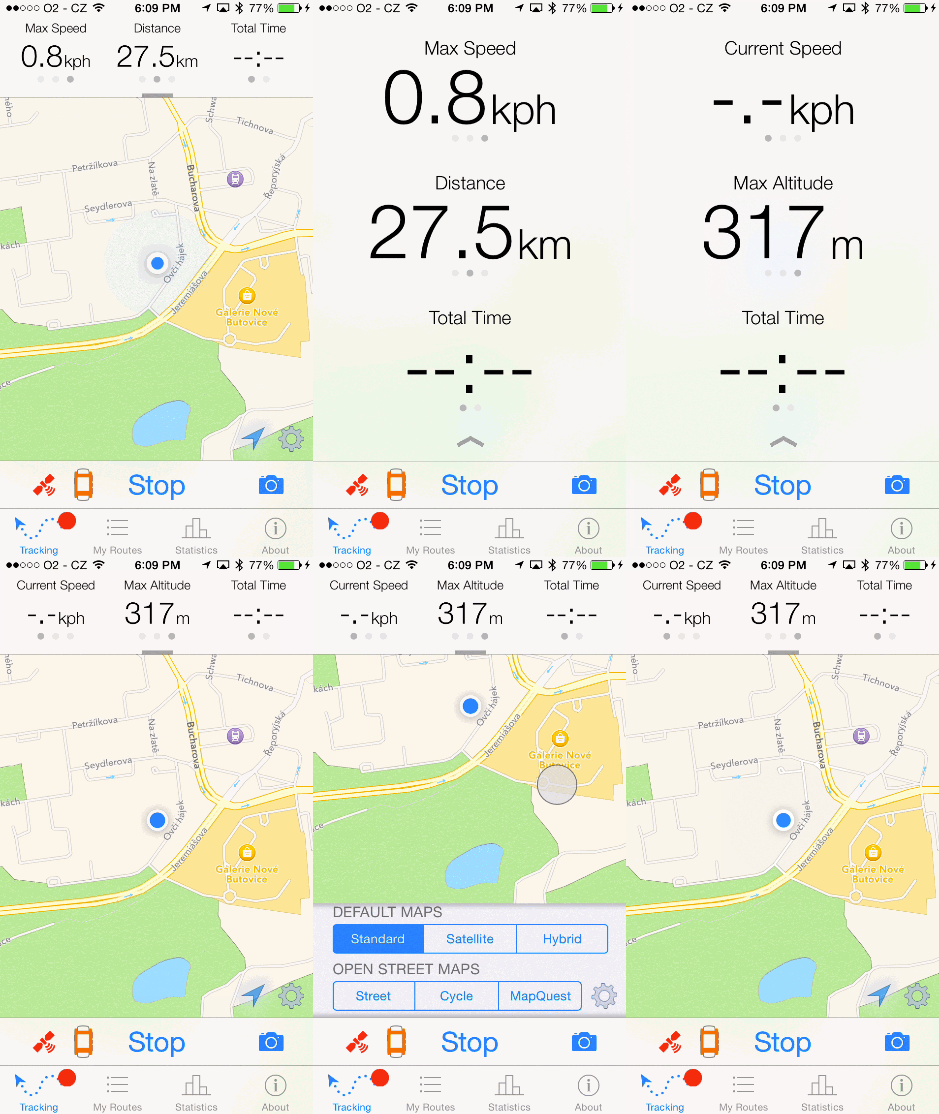
App Previews were introduced at WWDC’14 as a new App Store feature on iOS 8 that will allow developers to include 30 seconds video showcasing their app in action, right on the App Store. I believe it’s a great way to really show off your app to your potential customers right in the moment when they are considering the purchase or download. In this tutorial, I will show you how to make those previews even better.
To learn more about App Previews, I suggest you watch the WWDC’14 session Creating great app previews that goes into detail of what exactly Apple considers to be a great App Preview, and what are the rules. In a nutshell:
- time limit is 30 seconds
- vast majority of the video must consist of screen capture of your app
- you are advised to use new capability of Quick Time in Yosemite to record screen of your physical device *
- you have to disclose which parts of the video show functionality that is only available after an in-app purchase
- I don’t have Yosemite yet so I haven’t been able to try this out, but it should be quite easy to do. Again, refer to the session video, it’s explained there.
Now, if your app is a utility, or really any type of non-game that offers rich user interactions, for example interactive transitions or any elements involving “dragging around”, the video itself might not be able to clearly communicate that. Unless.. you were able to somehow show where exactly are all those touches happening. And that’s where this tutorial comes in!
I created a simple tool that lets you enable showing all touches happening inside your app. It’s a UIWindow subclass that you just add to your project and then swap it with the original main window. For those of you who are not sure how to do that, I will describe the steps shortly. But now, let’s look at a demo.
Demo

Here you can see a short gif showing some interactions in Routie, with touches included. Please excuse the lags, they are caused by the gif recorder, not by the actual tool.
The tutorial steps
- Download
GSTouchesShowingWindow.h,GSTouchesShowingWindow.mandGSTouchImage@2x.pngfrom GitHub here, and copy them to your project. Make sure the ‘Copy files if needed’ is checked. - If you are using Storyboard – In your
AppDelegate.m, import the header:#import “GSTouchesShowingWindow.h”and add the following
-windowmethod. This will provide the app with our own window instance instead of the default UIWindow.- (GSTouchesShowingWindow *)window { static GSTouchesShowingWindow *window = nil; if (!window) { window = [[GSTouchesShowingWindow alloc] initWithFrame:[[UIScreen mainScreen] bounds]]; } return window; }If you are still using plain old .xib files – you just need to open
MainWindow.xib, select the window and then change the class in Identity Inspector fromUIWindowtoGSTouchesShowingWindow. - That’s it! There is no step three.
All your touches will now be shown and you are ready to create that amazing App Preview for your app! Just remember, once you are done shooting the video, don’t forget to comment out the window method (or change the class back to UIWindow, if you are using xibs).
I hope this post was helpful to you. If you have any questions, please don’t hesitate to ask in the comments sections below. If you want to know more about how theGSTouchesShowingWindowclass actually works, take a look at the Readme on GitHub, or at the source itself (it’s not that long, really). Basically, it’s just intercepting all events, and adding/moving/removing touch imageViews as necessary.
If you used this in a video that is now on the App Store, I’d love to hear about it! Feel free to post about it here in the comments, or you can send me an email at lukas [at] glimsoft.com.
Pingback: Ceiba3D Studio | Input.GetTouch(0).position LAG x 2()